FUJI X-HALF REVIEW
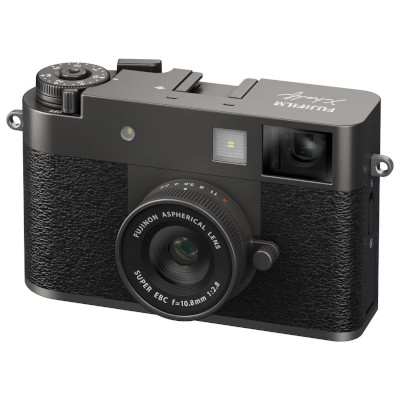
Fuji X-Half
| Type: | Mirrorless |
| Medium: | 17.74MP |
| Image size: | 13.3mmx8.8mm |
| Lens: | 10.8mm f2.8 |
| Flash: | Cold Shoe |
| Sync Type: | - |
| Sync Speed: | - |
| Origin: | Japan |
| Year: | 2025 |
| Street price: | $1000 |
SD Card
INTRODUCTIONThe Fuji X-Half (oficially X-HF1) is a digital "Half Frame" camera, that simulates the film camera experience to a next level. It was released in Japan in 2025.  I have a lot to tell about this very special camera, as it replaced many cameras in my usual toolbox.  BEST SUITED FOR:
PERSONAL NOTESThe Fuji X-Half is not for everyone. You have to understand what it is before judging it. It is not meant to be the best camera at all. In many ways, it lacks regular options present on many other cheaper cameras, but...  The Fuji X-Half is a compact, lightweight, digital camera, that emulates the experience you get with a regular film camera. It is much more close to a Lomo LC-A, than a Hasselblad 500. It is more like an entry level cheap camera that is fun. Oh I love my Hasselblad cameras, but they are not as fun as a Lomo. They are different beasts with different uses. The X-Half does not try to do perfection, there is always an element of surprise involved, and I love it.  One very special thing about the X-Half, and it makes total sense when you think about it, is that the sensor is oriented vertically. It shoots vertical, exactly like a real 35mm half frame camera, like the Olympus Pen. So when shooting it tilted 90 degrees, it will take regular horizontal photos.  The X-Half is pushing the film camera experience to a whole new level. Fuji is known for its film simulations that are costomizable. Having used over 300 film cameras over the time, I did explore a lot of different emulsions and techniques, and I have to say that Fuji film simulations are quite impressive. Even if the simulations from the X-Half has less customisations compared to other Fuji models, it's still very good. On the X-Half we can control the Film, White Balance (just the temperature, not the full Red / Blue adjustment), Film Grain Size and Strength, Portrait Enhancer, ISO and +/-. There is no Color, Saturation, Tone, Contrast. Even with less options, I was able to do excellent simulations, I will list them lower on this page. A simple SD card can replace a lot of film emulsions. When you get your recipes to your taste, this becomes a faster, simpler, and more cost effective process. I wasn't sure if paying CAD1000 for this camera made sense, but when I went on-line to see the price of fresh film, Just shooting 20 rolls would trigger the psychological return on investment, so the decision to buy the camera was even easier.  On top of film simulations, the X-Half also have Filters, like expired film, high and low key, sepia, fisheye, light leak, mirror, ... The Mirror filter is extremely fun to play with, as you can compose live, diretcly on the back screen. It helps to create the funniest compositions. 
 And when you combine the mirror filter with dyptique (more details on how to do that later on), it gets wild!  There are 26 filters to play with. Note that these filters are not able to be on top of the film simulations. It is one or the other, not the combination. For example, the light leak filter gives the orange-yellow leaks that are seen on negative color film only. It would have been nice for example to have light leaks on positive or B&W films. 

 From left to right : light leaks on E-6 slide film, on C-41 negative color film, and on B&W film. On the X-Half, the only type of light leak available is the middle one (C-41). There are two main ways of using the camera: The normal mode, and the film roll mode. Also, there is a film winder lever, and it has different behaviour depending in which way you are using the camera. In the regular mode, you can use the camera like you would any other: take a photo, compose on the screen or viewfinder, look at the result. You can switch from photo to video and vice versa. You can change settings between shots. In this standard mode, the film advance lever can be pushed or pulled. If pushed, it acts like the play button and you will see the last photo taken. If pulled, it will make a dyptique image using the previous one, with the next one you will take. Note that the new dyptique image does not replace the 2 other ones ; from 2 images, you will have 3 images, the 2 original ones and the dyptique. 

 Example of a dyptique and its 2 regular images The other more fun way, in my opinion, is using the Film Roll mode, so you can have an experience closer to a real film camera. In the Film Roll Mode, the film advance lever works like on a regular film camera, you have to pull it to be able to take the next shot. In that mode, you won't be able to compose on the screen, you only have access to the optical viewfinder, which is similar to an old entry level film camera finder. So composition is a bit approximate as there is paralax between the lens and finder, but also, the finder is a bit narrow, it really fells like an old Kodak Instamatic, a Agfa Optima, or a Olympus Pen. Very fun, it feels like the many times I took an old camera with me and just started snaping without thinking too much. Composition is not perfect, timing is also not always good as there is some lag, focus is not always good, you get black shots if you forget the lens cap on... Everything feels like a real film camera! 


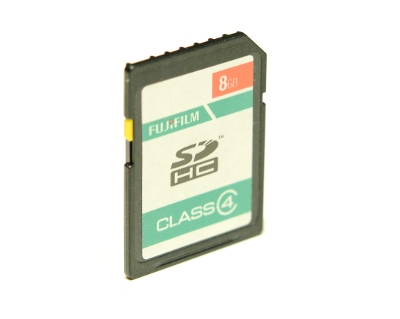
 When you finish a roll, the film counter rewinds to zero, (indeed a little motor sound would have been nice) then you can either "develop" the roll using the app on your phone, or simply copy the files directly with a SD card reader. I did try the app on my phone, it is very nice and you see the images appearing over time, it's a bit like when we were going to the local photo lab to process the film. I just manually copy the files to my computer instead. Wether you use the app or not, at the end of the film roll, the camera creates a contact sheet image which are very nice : 


 Here is one of them in more detail, click on it for original size :  As mentioned before, the X-Half lacks many basic options, but it does have a tripod mount.  The flash is a LED light, probably to be able to use it in video mode, but it does not feel right when shooting stills. On top of the camera, under that nice shoe cover is a "cold" shoe, and as there is no PC sync connector, so there is no way to sync to an external flash. The only way to shoot with an external flash is to manually trigger it yourself while in BULB mode. Something I did for a while on older cameras : You put the shutter in BULB mode, you press the shutter button, and keep it open, you manually trigger you flash (or flashbulb, hence the name BULB), then depress the shutter button. Obviously, you have to calculate and set the distance of your subject and aperture according to the guide number of your flash or bulb. Guide number (for a specific ISO) equals distance (feet or meters) times aperture. Example : GN100 @ISO 100 in feet can give 10 feet at f10 (10 x 10 = 100). 
 
 Guide number examples for different flashes and flash bulbs. Here are my personal favorite X-Half Recipes:I simulated pretty much all the films I loved in the past, including weird concoctions like Caffenol, K-14 processed in B&W, crossprocess C-41 in E-6 and vice-versa, Redscale and even Infra-Red films. To do this, as you can see below, I fixed a threaded ring on the camera with aluminium and gaffer tape, so I was able to add on physical filters.  To emulate the Redscale film (inverted C-41 negative film), adding a physical red filter did a good job ; not exactly the same, but pretty close. 

 To emulate the Caffenol results I had in the past, simply using the filter called "Sepia" was good enough. 

 And for Infra-Red, the performance of the X-Half is just not good enough, it would necessitate to convert the camera to IR like my other infrared cameras. I tried with multiple infrared filters, and even with the camera on a tripod, the controls for long exposures and focus ability with dark filters are not that great, making the experience too demanding, and the results are mediocre comparing to a dedicated infrared camera. 

 On the brighter side, I found the basic film simulations to be excellent, but here are the 3 film recipes I love with this camera : ADOX ORT 25 - My favorite black and white film. I shot this film in 35mm, 120, 4x5 and 8x10. This emulsion is orthochromatic, more sensitive to green. When doing portrait, you better have your model use green lipstick to get better results. Is it quite high contrast, fine grain, I just love the aestethics this film gives. Examples from the real film:

 Results from the X-Half: 


Kodak Verichrome Pan 125 - My favorite black and white grainy film. I shot this film in 126 and 120 film rolls. This is a vintage emulsion, from the 70s. It has a very pleasing grain that I love. As this is an old film, I always processed it with Blazinal developer using stand development. I can't really explain it, but it looks like an even better grain than the Ilford HP5+ 400. Examples from the real film:

 Results from the X-Half: 


Kodak Kodachrome 64 - I shot this in 35mm and 120 film rolls. These slides are soooooo nice, probably the best looking color process ever (in my opinion), receiving the slides by mail from the Kansas processing plant had some magic to it. Looking at the slides I still have home is an exercise that is always stunning. Examples from the real film:

 Results from the X-Half: 


A little tip, when using the Film Roll Mode, I use a hot shoe cover with a printed sticker on it to remember which specific film recipe is currently programmed.  If you buy a X-Half, just remember to make sure that it has its latest firmware, as the experience was greatly enhanced from Version 1.30.  CONCLUSIONThe Fuji X-Half is a powerful creative tool, a fun, compact toy that frees up your mind, and makes it possible to connect with imperfection, making the experience close to what it was to shoot with a Holga, or any other Lomo cameras. It is not for everyone, and I absolutely love everything about it.  PHOTO SAMPLES


VERDICT:
4 FLASHBULBS 
| |||||||||||||||||||||||||||||||||||||||||||||||||||||||||||||


CONTACT